Printing on transparencies isn’t just a task; it’s an art that opens a world of creative possibilities. Mastering this skill for stunning presentations, unique crafts, or eye-catching signs can transform your projects. Our guide simplifies the process, ensuring you know how to print transparencies every time. Drop in to unlock the secrets of printing on transparencies, and prepare to impress with your newfound expertise.
Considerate How to Print Transparencies Printing
Let’s explore the world of transparency printing. This method is not just about putting ink on paper. It’s a way to create visuals that stand out. We will look at what transparencies are and their uses. We will also cover the different types of transparency films.
What Are Transparencies and Their Uses?
Transparencies are transparent sheets for printing. They let light pass through. This makes them great for overhead projectors and displays. People use them in classrooms, meetings, and for craft projects. They are useful for showing graphics and text clearly and sharply.
Types of Transparency Films and Their Differences.
There are two main types of transparency films: inkjet and laser. Inkjet films have a special coating. This coating holds the ink and stops smudges. Laser films can handle the heat from laser printers. Each type works best with its matching printer. Choose the right one for your project for the best results.
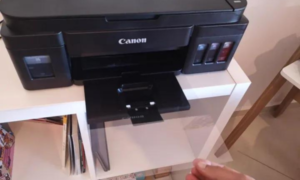
Choosing the Right Printer for Transparencies
Not all printers work well with transparencies. Inkjet printers are often a good choice. They handle the special coating on inkjet transparency films well. Laser printers are great for laser transparencies. They can cope with the heat these films need. Check your printer’s manual to see if it can print on transparencies.
Selecting the Appropriate Transparency Film
Choose the correct film for your printer. Inkjet transparency films have a coating that absorbs ink. This stops the ink from smudging. Laser transparency films can handle high heat. They won’t melt in your printer. Make sure the film matches your printer type.
Necessary Supplies and Setup
You need a few things to print on transparencies:
- Get the right type of transparency film.
- Check your printer settings. Some printers have a special setting for transparencies. Also, make sure you have enough ink or toner.
- Find a clean, dry place to let your transparencies dry after printing.
Step-by-Step Guide to Printing on Transparencies
Printing on transparencies can be easy with the right steps. This guide will walk you through the process. We’ve got you covered from designing your document to loading the film. Let’s start printing with clarity and precision.
Designing Your Document for Transparency Printing
When designing for transparencies, could you keep it simple? Use bold, dark colors for text and images. This makes them stand out against light backgrounds. Remember, printers don’t print white. Any white in your design will be clear on the transparency. Check your design on a light background to see how it will look.
Adjusting Printer Settings for Optimal Results
Your printer settings are essential. Choose ‘high quality’ or ‘photo quality’ for sharp images. If your printer has a ‘transparency’ setting, use it. This adjusts the ink output for the film. Test print on regular paper first. This saves your transparency film for the final print.
Loading and Aligning Transparency Film in the Printer
Loading the film correctly is crucial. Find out which side of the film is for printing. It’s usually rougher to the touch. Place the film in the printer tray correctly. Most printers need the rough side facing down. Check your printer’s manual for specific instructions. Align the film with the guides in the tray for even printing.
Advanced Tips and Techniques
Printing on transparencies can go beyond the basics. With these advanced tips, you’ll get clear, sharp images. You’ll also learn how to solve common printing problems. Plus, discover creative ways to use your transparencies.
Ensuring Clear and Sharp Images on Transparencies
For clear images, use high-resolution graphics. The higher the resolution, the sharper your print. Before printing, clean the printer heads. This prevents ink smudges. Use your printer’s ‘photo’ or ‘high quality’ setting. This gives you the best image clarity. Let the ink dry completely before handling the transparency.
Dealing with Common Printing Issues
If the ink smears, let it dry longer. If the colors are off, check your printer’s color settings. Ensure you’re using the right type of transparency film for your printer. If the film jams, load one sheet at a time. Keep the film free of fingerprints and dust.
Creative Ideas for Using Printed Transparencies
Transparencies are great for more than presentations. Use them in scrapbooking for a layered look. They work well for window displays and light boxes. You can also print patterns for tracing or stenciling. Get creative with how you use them in your projects.
Post-Printing Processes
After printing on transparencies, the job still needs to be done. Proper handling, cutting, and storage are critical. These steps ensure your transparencies stay in top condition. Let’s look at how to handle them right after printing, cut and apply them, and store them for long-term use.
Handling and Drying Printed Transparencies
Handle printed transparencies with care. The ink can smear if it’s still wet. Let them dry completely before touching them. This can take a few minutes. Place them in a dust-free area while drying. Avoid stacking them until the ink is fully set.
Cutting and Applying Transparencies
When cutting transparencies, use a sharp blade for clean edges. Measure and mark your cutting lines carefully. Cut on a flat, stable surface. If you’re applying the transparency, clean the surface first. Use a smooth tool to avoid air bubbles under the film.
Long-term Storage and Care of Transparencies
Store transparencies in a cool, dry place. Keep them away from direct sunlight. This prevents them from curling or getting damaged. Use a protective sleeve or a folder for storage. This keeps them clean and free from scratches. Handle them by the edges to avoid fingerprints.
Bottom Line
Mastering how to print transparencies can significantly enhance your presentations, crafts, and displays. You’ll always achieve precise, vibrant results by following these steps and tips. Success is choosing suitable materials, settings, and handling techniques. Embrace this skill, and let your creativity shine through your transparent prints.


