Removing water slide decals can seem daunting if you’ve never done it before. But with some simple tools and techniques, the process is quite straightforward. Whether you need to update old, faded decals or change the look of your hard-surfaced items, learning proper decal removal methods will give you the confidence to peel off and replace decals easily. With minimal effort, you can give your surfaces a fresh new appearance.
This article will walk you through safe and effective water slide decal removal steps, from the best solutions to techniques to avoid damage. You’ll learn pro tips that will have those old decals sliding right off.
Explanation of What Water Slide Decals Are
The world of water slide decals is those sleek, detailed designs that add finesse to models and crafts. But wait, the struggle begins when it’s time to bid them farewell. No worries! Let’s unravel the simplicity behind removing water slide decals, ensuring a pristine finish without the fuss.
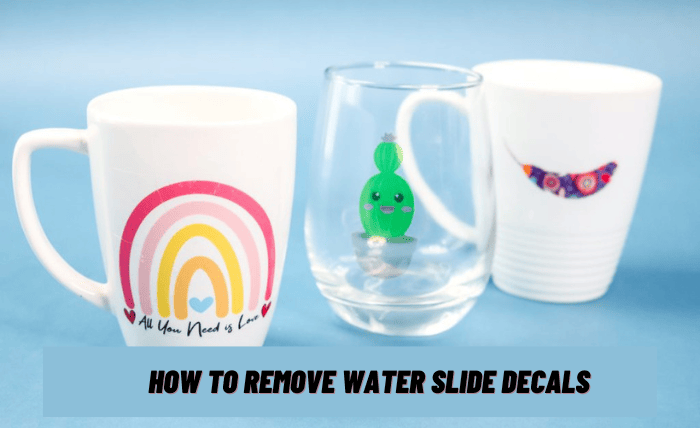
Water slide decals, the unsung heroes of hobbyists and crafters, are ultra-thin designs that slide off a paper backing when soaked. Like a temporary tattoo, they adhere to surfaces, elevating the aesthetic without bulk. These subtle yet impactful additions are a game-changer in the creative realm.
Their Applications in Various Hobbies and Crafts
The artisans ‘ secret weapons are model cars, scale aircraft, or ceramic mugs – water slide decals. They seamlessly merge with surfaces, bringing intricate logos, details, and emblems to life. From hobby models to personalized DIY projects, the versatility of these decals knows no bounds.
Importance of Proper Removal for a Clean Finish
A flawless finish requires skill in applying decals and finesse in removing them. Peeling or scraping can damage the base, leaving a not-so-pretty residue. The key lies in a gentle removal process, ensuring that the elegance the decal introduces isn’t marred by its departure.
List of Necessary Tools for Decal Removal
Hands-on with removing water slide decals – the unsung heroes of crafting finesse. There is no need for a toolbox takeover; just a handful of straightforward tools can make the process a breeze. Say goodbye to sticker struggles and hello to a smooth, clean canvas.
Tweezers: Precision is the game’s name, and tweezers are your nimble allies. Use them to delicately lift the decal’s edges without causing unintended mishaps.
Cotton Swabs: The humble cotton swab becomes a gentle eraser, helping you navigate intricate details. Dip it in a mild soap solution for effective and controlled cleaning.
Mild Soap: A touch of mild soap mixed with water creates a decal-friendly solution. It aids in softening the adhesive, making the decal more cooperative during removal.
Microfiber Cloth: The unsung hero in the cleanup crew, a microfiber cloth ensures that your surface stays pristine. It’s perfect for gently wiping away any remaining residue.
Decal Softening Solution: The secret sauce for stress-free decal removal. This solution works magic by loosening the adhesive grip, allowing a smooth slide-off without damaging the underlying surface.
Explanation of Each Tool’s Role in the Process
Tweezers: Precision is key – use tweezers to lift the decal’s edges, ensuring a controlled and damage-free removal process. The delicate touch of tweezers makes them indispensable for intricate designs.
Cotton Swabs: Dipped in a mild soap solution, cotton swabs become the artists’ eraser. Their gentle touch is perfect for navigating the nooks and crannies of detailed decals without causing harm.
Mild Soap: The mild soap solution is your ticket to a cooperative decal. It softens the adhesive, making the decal pliable and easy to work with during removal. It’s the magic potion for a hassle-free experience.
Microfiber Cloth: The microfiber cloth ensures the surface stays spotless after decal removal. Its soft texture is ideal for removing residual adhesive without leaving a trace.
Decal Softening Solution: The hero of the lineup, the decal softening solution is the key player in making the adhesive surrender. Applied before removal, it transforms a potentially tricky task into a smooth and damage-free process.
Cleaning Residual Adhesive
Now that we’ve gracefully bid farewell to those water slide decals, let’s tackle the aftermath. Cleaning up is as essential as the removal itself. Follow these straightforward steps to ensure your surfaces stay flawless post-decal.
Residual adhesive, the silent leftover from the decal party, can be swiftly dealt with. Grab a cotton swab, dip it in a mild soap solution, and gently rub away any sticky remnants. The soap acts as the superhero, dissolving the adhesive without sweat. Wipe away the residue with a microfiber cloth, leaving your surface pristine.
Polishing and Protecting the Surface
Now that the residue is history, it’s time to give your surface a little love. A gentle rub with a clean microfiber cloth adds a final touch of perfection, ensuring a smooth and polished finish. This step not only removes any lingering traces but also enhances the overall appearance of the surface. Think of it as a mini spa day for your crafts and models.
Surface-Specific Care
Different surfaces demand different TLCs. Avoid harsh chemicals and use a mild soap solution for painted surfaces. Wood surfaces? A cautious approach with minimal moisture is the key. Glass and plastic surfaces, on the other hand, welcome a clean microfiber cloth with open arms. Tailoring your care routine to the surface type ensures longevity and continued brilliance.
Decal Tearing During Removal
Have you ever faced the frustration of your water slide decals playing hard to get? Fear not! We’ve got your back with practical strategies for a smooth decal removal process. Let’s tackle those hurdles together and ensure your decals depart without a trace.
When decals decide to fight, take a breath and reach for a decal-softening solution. Apply it generously, allowing the adhesive to surrender gracefully. This softening step ensures a more pliable decal, reducing the risk of tearing during removal. Patience is your ally here – slow and steady wins the decal race.
Adhesive Residue Challenges
The residue left behind can be sticky, but it’s no match for a cotton swab dipped in a mild soap solution. Gently rub the residue away, letting the soap dissolve the adhesive effortlessly. Follow up with a microfiber cloth to clean the surface, leaving no room for stubborn remnants. A little TLC goes a long way in conquering adhesive challenges.
Surface Damage Prevention
Prevention is the name of the game when it comes to safeguarding your surfaces. Use tweezers delicately during decal lifting to avoid unintended damage. Consider repeating the softening process for a more forgiving removal if dealing with particularly stubborn decals. Remember, a cautious approach ensures that your surfaces remain unscathed, ready for the next creative endeavour.
Conclusion
How to remove water slide decals is now within your grasp. Armed with simple tools and techniques, bid farewell to sticker struggles. Safely and confidently peel off and replace decals, unveiling a fresh new appearance for your surfaces. Follow these steps, and you’ll find those old decals sliding off effortlessly, leaving behind a pristine canvas for your next creative endeavour.


